
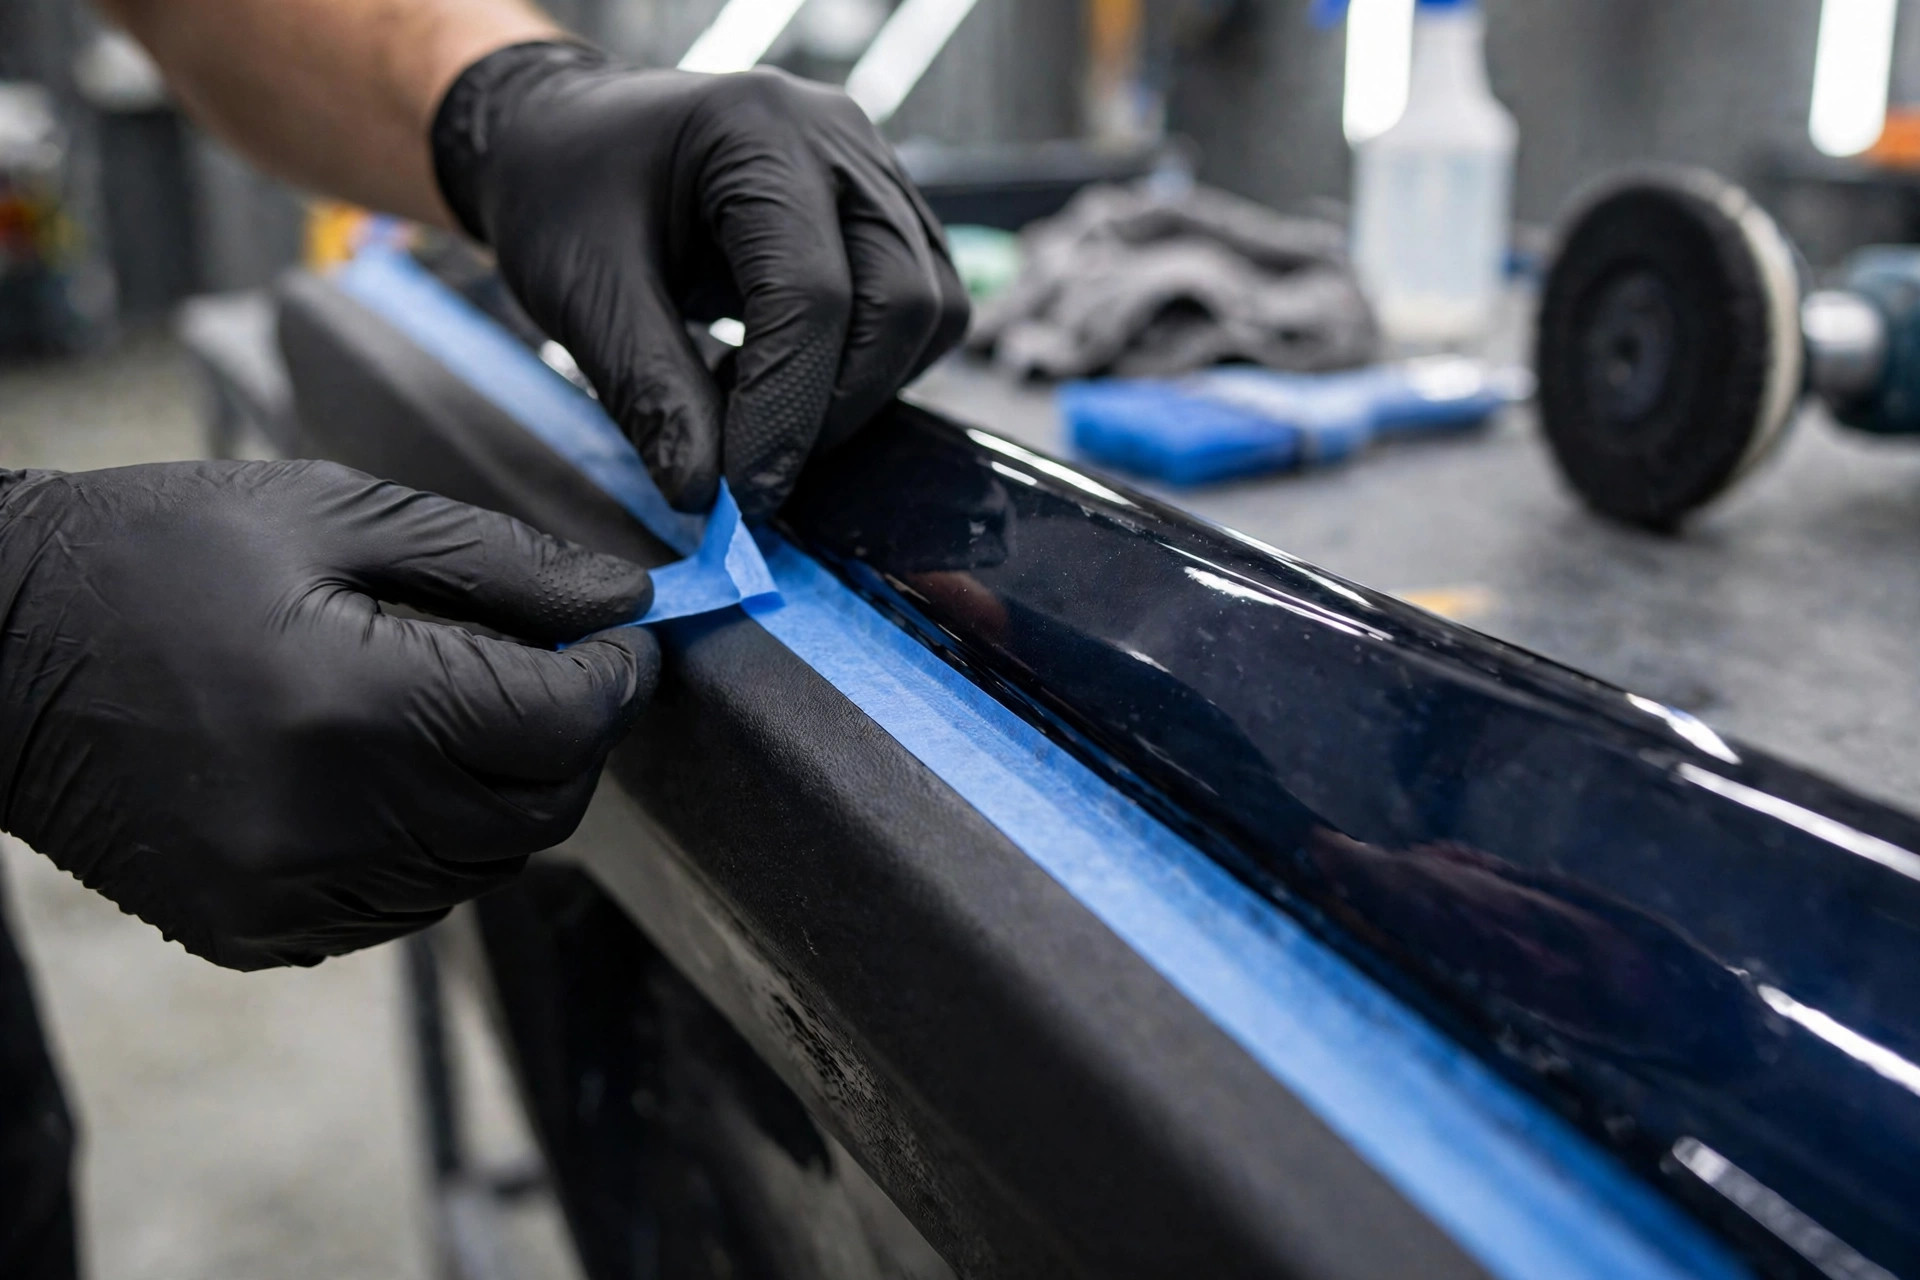
Every machine polisher owner who details a car at home learns the same lesson eventually, usually the first time a loaded pad drifts onto unprotected trim: compound and polish love black plastic trim, and not in a good way. A single pass with a loaded pad can smear white residue into textured bumper grain that takes an hour of scrubbing to remove, and some compounds stain raw plastic permanently. The pros avoid all of this with a roll of tape and five minutes of prep, and the difference between a clean detail and a trim disaster usually comes down to whether the masking step happened.
This guide covers how to mask exterior trim before polishing: which tapes to use, how to handle the tricky pieces like window seals and emblems, and what to do if polish still finds its way onto the plastic. It is one of the cheapest skills in detailing, and it pays for itself the first time you polish a car with faded cladding.
Why Polish and Compound Damage Black Trim
Polishing compounds contain fine abrasives suspended in a carrier that dries to a powdery or pasty residue. Paint is smooth and hard, so residue wipes off easily; textured black plastic is porous and grainy, so the same residue packs into the grain and bonds as it dries. On badly faded trim, the abrasives can also physically scour the oxidized surface, leaving light-colored scratches that no dressing will fully hide.
There is a chemical angle too. Many compounds contain solvents and cleaning agents that strip the oils out of plastic, accelerating the graying you were probably trying to fix by polishing the car in the first place. A pad spinning at speed generates heat as well, and that heat can partially melt the surface of cheap plastic trim, leaving a permanently shiny, blotchy patch. None of this matters on glass or paint, which is why polishers develop the habit of running right up to edges, and why that habit punishes anyone with unpainted trim.
Choosing the Right Tape for the Job
Standard blue painter’s tape is the workhorse for most masking: it adheres well enough to survive a polishing session, removes cleanly from plastic and paint, and is cheap enough to use generously. For tight curves and narrow trim, use quarter-inch or half-inch fine-line tape, which follows contours without wrinkling. Automotive masking tape in green or yellow is worth the upgrade on hot days, because it resists adhesive transfer better than hardware-store tape when the sun heats the panels.
Avoid duct tape, electrical tape, and cheap masking tape from discount stores. Duct tape leaves adhesive that requires solvents to remove, electrical tape stretches and leaves residue when warm, and bargain masking tape can bond to textured plastic so aggressively that it pulls the surface texture off with it. Keep two widths on hand, fine-line for detail work and standard for long straight runs, and you will be able to mask almost anything on the car.
- Standard blue painter’s tape for most masking work
- Quarter-inch or half-inch fine-line tape for tight curves and narrow trim
- Automotive masking tape in green or yellow, which resists adhesive transfer better on hot days
The masking tape article offers general background on the material and how it is made.
What to Mask: The Full Checklist
Walk the car before you tape and mask every piece of unpainted black plastic the pad could touch: bumper trim and cladding, fender flares, cowl panels, windshield washer nozzles, mirror housings and the black triangles at the mirror bases, door handles, side moldings, rocker panel trim, license plate surrounds, and fuel filler doors. Do not forget rubber window seals and weatherstripping, which grab polish residue even worse than plastic, or emblems and badges, where compound packs into every crevice of the lettering.
The same protect-first mindset applies to jobs like Roof Racks on Panoramic Glass Roofs: Mounting Without Cracking the Glass.
Also mask the edges where two panels meet if one is painted and the other is trim: the pad will ride across the seam and smear product onto the plastic side. Convertible tops, vinyl wraps, and matte-finish trim deserve tape too, since compounds can alter their finish permanently. When in doubt, tape it. Tape is cheap; trim restoration is not, and the mistakes that ruin black plastic often start with an unmasked polishing session.
Tape Technique and Tricky Areas
Apply tape in the direction the pad will travel so the edge of the tape does not catch and lift. Press the tape firmly into textured grain with your fingertip so compound cannot wick underneath, but do not stretch it: stretched tape wants to shrink back and will pull away from curves. Overlap short pieces around tight curves rather than forcing one long piece to bend, and run a second layer over seams where two pieces meet.
Windshield cowls and wiper arms are the classic tricky area: the pad bounces over the wiper arms and slings compound everywhere. Tape the arms themselves and drape a microfiber towel over the cowl if it is heavily textured. Around emblems, use fine-line tape to outline the badge, then fill the middle with a slightly larger piece.
For rubber window seals, push the tape slightly under the seal edge so the pad cannot slip beneath it. These details take a few extra minutes and eliminate the vast majority of cleanup.
Should You Dress the Trim Before Taping?
There are two schools of thought. Some detailers dress the trim first so that any polish that sneaks under the tape lands on a protected surface and wipes off easily. Others insist on taping bare trim because dressing makes tape adhesion worse, and tape that lifts mid-session is worse than no tape at all. Both have a point, and the right answer depends on the tape.
With quality automotive tape applied firmly, tape sticks fine to clean bare trim, and that is the safest baseline. If you are polishing a car with severely faded trim that you plan to restore afterward anyway, a light pre-dressing adds insurance at the cost of fussier taping. Either way, plan to clean and dress the trim after polishing: polishing dust settles everywhere, and the trim deserves its own step once the paint work is done. For the full paint-correction context, how compounding and polishing differ and the complete detailing sequence explain where masking fits in the workflow.
When Polish Still Gets on the Trim
Even careful masking leaves the occasional slip, usually where the pad kicked at an edge. If you catch it while the residue is still wet, a damp microfiber towel removes it easily. If it has dried, an all-purpose cleaner diluted for plastics, worked in with a soft detailing brush, lifts most residue out of the grain. A pencil eraser or a dedicated wax-removal eraser block works surprisingly well on dried white spots in textured plastic.
For stubborn staining where the compound has chemically lightened the plastic, you may need to step up to a proper trim restorer or even re-dye the affected area. This is the moment people discover that prevention was the cheaper option. If the stain will not budge, textured plastic trim care techniques and restoring small emblems and badges cover the recovery options for grainy surfaces and tight crevices.
Removing Tape Without Residue
Remove tape as soon as the polishing step is done, ideally before it bakes in the sun. Pull it back on itself at a low angle, slowly, rather than yanking upward. If any adhesive remains, a quick wipe with an adhesive remover or isopropyl alcohol on a microfiber takes it off; avoid aggressive solvents on raw plastic, which can dull the finish you just protected.
Good light matters for that inspection, a point covered in Inspection Lights for Interior Car Cleaning: Finding Dirt You Cannot See.
Once the tape is off, inspect every masked piece in good light before moving on. It is far easier to touch up a small smudge now than to discover it after you have dressed the trim and called the job done. Then give the trim its own cleaning and protection step: the masking did its job, the paint looks great, and the trim deserves to look intentional rather than like an afterthought.
Related posts:


Cars like these are part of a bigger Detailing & Car Care story — Interior Plastic Trim Restoration: Reviving Faded Dashboards, Consoles, and Door Panels tells the next chapter.
Found this useful? Pass it on to a friend who would appreciate it too.

